My family loves fresh, homemade applesauce. During the fall, I had the opportunity to use apples from the tree in front of the house. Now that those apples are gone, we have to go to the store to buy apples.
So, for yesterday’s applesauce, I used five types of apples: Jonagold, Empire, Macintosh, Granny Smith, and Macoun. When you make your applesauce, I recommend using at least three types of apples for better flavor.
 |
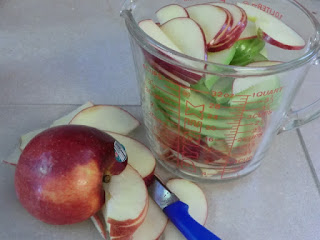
| Here are a few of the approximately 14 apples that I chose for my project. |
I selected my apples, picking a few from each of the types of apples previously mentioned. I cut and cored the apples and then sliced them. I used a quart-sized measuring cup to keep track of the apples that I had sliced.
 |
|
| The apples should be sliced fairly thin to aid in the speed of cooking. |
Notice that I did not peel the apples. That’s because the skin of an apple has an enormous amount of nutrients. These include soluble and insoluble fiber, antioxidants, Vitamin A, and Vitamin C, as well as other vitamins and minerals. For more information about the nutritional value of apple skins, take a look at: Livestrong (benefits of apple skins).
I normally cut up five quarts worth of apples. I rarely cut up more than that because that is all that my pot will handle! As I’m cutting apples, my mom and I enjoy small taste tests of different types of apples.
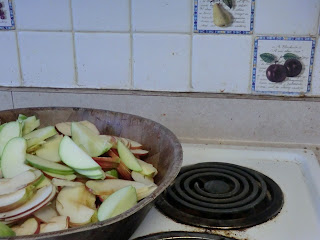 |
| Ready to be transformed from apple slices to applesauce! |
I then get out my big pot and I pour cold water on the bottom of the pot to boil. For five quarts of apples, I find that two and a half cups of water seems like the right amount. This amount can be adjusted, depending on how dry or moist your apples are. On occasion, I add a few pears in my applesauce. When I use pears, I decrease the amount of water that I use because pears are very moist. I turn the heat to high and wait for the water to boil.
 |
| Apples cooking in a big pot! |
After the water boils, I add all of the apples, turn the heat down to a little above medium and cover the apples. I set a timer for ten minutes, and I go to read a book! After the timer beeps, I check the apples. I stir them and check to make sure that there is enough water in the pot. If there isn’t enough water, I add a little water, approximately half a cup. Then I cover the pot again and let the apples cook for another ten minutes. The apples get stirred again and I also check to make sure that there is enough water in the pot. The apples cook down through a steaming process.
 |
| Here are the apples after cooking for twenty minutes. |
Once again, I return to my book. The timer, of course, is always close at hand because, when I am reading, I find that I lose track of time. After another ten minutes, it is time to check the apples again. They are cooked down sufficiently at this point. Over the months of regular apple sauce preparation, I have found that the apples cook sufficiently in thirty minutes. I turn the heat to low and leave the lid off.
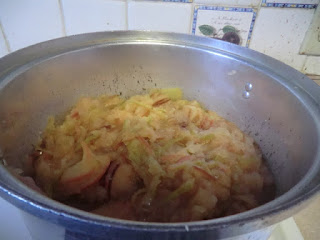 |
| The apples are now finished with the cooking process. |
At this point, it’s time to add the seasonings. I add the juice of three fresh lemons, one-third cup of sugar, a heaping half-teaspoon of cinnamon, and a heaping half-teaspoon of prepared lemon peel.
 |
| I like these seasonings. Some people may prefer less lemon juice and more sugar. Other options may include a little nutmeg. Season the applesauce to suit your tastes! |
I put the seasonings into the pot and let them steep for a few minutes.
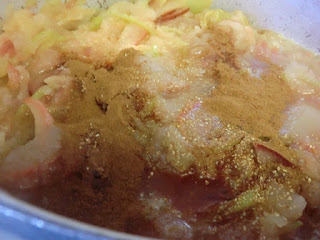 |
| The seasonings really add a great aroma to your kitchen! |
I then stir the seasonings to the pot. At this point, I turn off the burner and move the pot to a trivet on a counter. I place a second pot next to the pot with the cooked apples. In the second pot, I place a food mill. I put all of the cooked apples through the food mill.
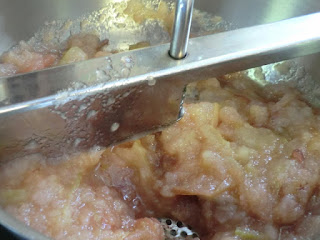 |
| Apples in the food mill |
I put the apples through the food mill twice for a smooth applesauce. If you like a more chunky applesauce, you may put your apples through just once. Some people use methods other than a food mill but I don’t know what they are.
The applesauce is now ready for a taste test!
The taste test is when you determine if you like your seasonings or if they need to be adjusted.
 |
| Five quarts of apples! |
After I put the applesauce away, I still have one extra step to accomplish:
I take the apple cores to the back yard, near the brush and trees, and I throw them on the snow so that the deer can have a little snack.
Bon Appetit!


